26.6.21
22.8.20
ISTRUZIONI PANCA DA GIARDINO // GARDEN BENCH INSTRUCTIONS
ISTRUZIONI:
I blocchi sono stati prima lavati con idropulitrice, successivamente dipinti con vernice a spruzzo.
Una volta preparato e livellato il terreno, i blocchi sono stati posati con l’aiuto della bolla e usando colla milleusi. In questa configurazione noi abbiamo preferito aggiungere anche una vite per fissare ulteriormente il bocco verticale dello schienale alla struttura.
Per la seduta le assi sono state sagomato di modo che si incastrino nei blocchi, i pali dello schienale sono infilati nei fori dei blocchi, tranne l’ultimo in cima che è avvitato sulla sommità dei blocchi verticali, per dare più stabilità al tutto.
Naturalmente mi sono fatta aiutare dagli uomini di casa: mio figlio ha dipinto i blocchi, mio marito ha segato pali e tavole e forato i blocchi. Io ho preparato la posa, assemblato e incollato i blocchi e dipinto il legno. L’altro mio figlio faceva l’aiutante per tutti, insomma Lavoro di squadra!
//
INSTRUCTIONS:
The blocks were first washed with a high-pressure washer, then painted with spray paint.
Once prepared and levelled the soil, the blocks were laid with the help of bubble and using “milleusi” glue. In this configuration we preferred to add a screw to further fix the vertical seat back to the structure.
For the seat the boards have been shaped so that they fit in the blocks, the backrest poles are inserted in the holes of the blocks, except the last one, at the top, that is screwed on the the vertical blocks, to give more stability.
Of course I got help from my men: my son painted the blocks, my husband sawed poles and boards and drilled the blocks. I prepared the pose, assembled and glued the blocks and painted the wood. My other son was the helper for everyone, this is teamwork!
PANCA DA GIARDINO FAI DA TE // D.I.Y. GARDEN BENCH
 |
Rieccomi
qui, torno dopo molto tempo sul blog con un progetto fai da te fatto
interamente con materiali di recupero che avevo già. Una panca da giardino in
blocchi di cemento e legno!
L’ispirazione l’ho presa da Pinterest dove ci sono
tantissimi progetti con i blocchi, le
motivazione principali sono il costo irrisorio e la resistenza della panca!
Questi blocchi in cemento giacevano dietro casa almeno
dagli anni 70, i pali di legno erano avanzati da un altro progetto, le tavole
vengono da un vecchio carro.
Ho comprato solo la vernice, la colla e l’impregnante con
circa 15 euro. Trovate le istruzioni e le foto del processo nel prossimo post.
Oltre alla soddisfazione di creare la panca da me, mi fa
felice l’idea che non dovrò preoccuparmi che arrugginisca (come con quelle di
metallo), né che sia troppo piccola o debole per accogliere tre persone adulte
come volevo, quando le parti in legno saranno rovinate non sarà un problema
sostituirle.
Posso decorarla in modo differente cambiando accessori e
colori: cuscini, tappeto, candele, lanterne, luci, con ombrellone, senza, con
tenda, ….
Al momento ho riutilizzato un vecchio ombrellone blu per
proteggere dagli aghi di pino chi sta seduto, ho aggiunto un tappeto da esterno
preso da Casashop a 5 euro, riutilizzato 4 cuscini da sedia spaiati unendoli in
una fodera fatta con una tenda Ikea avanzata.
/
After a long time I am back on the blog with a DIY
project made entirely with recycled materials, that I already had. A garden
bench made of concrete blocks and wood!
The inspiration comes
from Pinterest, where there are lots of projects with blocks, my motivation is made
of the derisory cost and the resistance of the bench!
These concrete blocks
were behind my house from the 70s, the wooden poles remained from another
project, the boards come from an old wagon.
I only bought the
paint, the glue and the color for about 15 euros. You will find the
instructions with pictures in the next post.
I’m satisfied because
it’s a diy project and I am happy I will
not worry about rust (as for a metal
bench).
It is enough large and sturdy to accommodate
three adults and when the wooden parts will be ruined it will not be a problem
to replace them.
I can decorate it
differently changing accessories and colors: cushions, carpet, candles, lanterns,
lights, with umbrella, without, with curtains....
Right now I reused an
old blue beach umbrella (to protect me from pine needles), I added an outdoor
carpet bought at Casashop for 5 euros, reused 4 unpaired chair cushions joining
them in a lining made with an advanced Ikea curtain.
.
10.9.19
PICCOLE SCRIVANIE // SMALL DESKS
/
23.7.19
D.I.Y. LAMPSHADE WITH QUOTES
3.4.19
CLS CUSTOMIZE CONCRETE: oggetti decorativi in cemento // concrete decor items
1.4.19
IN-OFFICINA - Mercatino Artigianale // Handicraft market
22.12.18
Natale 2018 // Christmas 2018
Forse avrete notato che non ho scritto il solito post con i suggerimenti sui regali, io stessa ho scelto di farne meno, qualcosa fatto a mano, o esperienze.
.
In più seguendo questo link potete scaricare un regalino per voi: un template in pdf per un segnalibro personalizzato HOMESHAPED; se disponete di una stampante a colori vi basterà stampare il foglio, ritagliare lungo i tratteggi, e piegare a metà i 3 segnalibri, un po’ di colla et voilà!
28.11.18
IL MIO MOBILE PER IL SALOTTO: prima e dopo //
MY LIVING ROOM TV STAND: before and after
16.10.18
An arched window frame on the Fireplace Mantel
11.10.18
IL CAMINETTO //
THE FIREPLACE MANTEL
7.9.18
RI-USO N°8: da vassoio a bacheca //
REPURPOSE No 8: from tray to board
3.9.18
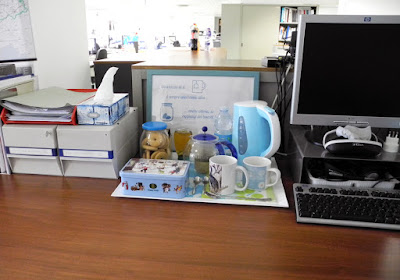
OFFICE TEA CORNER
.
To get inspiration here follows the details.
6.8.18
CESTINO ESTENDIBILE // EXTENSIBLE BASKET
Secondo post sugli articoli d’arredamento di moda che si ripetono nei cataloghi dei brands più comuni. Forse ne farò una serie vera e propria, qui trovate il primo.
.
I consider it a good item for do-it-yourself projects, the cheapest one costs less than 10 Euros, and the decorated versions can reach 4 times this price!
...
27.7.18
M1ka Market Place and Open Market in Treviso
24.4.18
EFFETTO SOPPALCO // MEZZANINE EFFECT
Immaginate una casa di due piani del 1965: al primo piano si entra in un corridoio centrale sul quale si affacciano 4 stanze, 2 per lato, tutte della stessa dimensione e vincolate da muri portanti; al secondo piano un unico ambiente, una mansarda abitabile con tetto a doppio spiovente e travi a vista in cemento. I due piani sono collegati da una scala nella parte posteriore della casa alla fine del corridoio centrale.
/
Imagine a two-storey house built in 1965: on first floor a central big hallway with 2 rooms on each side, all rooms with same size and limited by load-bearing walls; on second floor one big attic with pitched roof and concrete beams. An existing stair on the back of the house connects the floors, at end of the central hallway.
9.4.18
ILLUMINAZIONE PER LA CAMERA //
BEDROOM LIGHTING SYSTEM
.


