14.4.22
TIME CAPSULES - Osteria da Ninetta
7.12.20
DA PORTABICCHIERI A PORTACONDIMENTI // From Beer Glasses holder to Condiments Holder
Come
vi avevo anticipato, dal mio ultimo giretto alla Maisons du
monde ho preso un articolo al quale ho cambiato la destinazione d’uso: da
portabicchieri per la birra a portacondimenti.
Ho l’abitudine di portare sempre in tavola due tipi di
olio, due di aceto sale pepe, stuzzicanti e cavatappi, ma il mio cestino era
ormai troppo piccolo, così questo portabicchieri faceva proprio al caso mio!
During my last visit to the Maisons du
monde I took an article perfect for my Repurpose file: from beer glasses holder
to condiments holder.
I always bring on my table two types
of oil, two vinegar, salt pepper, toothpicks and bottle opener, but my basket
was too small so this one was just right for me!
22.8.20
ISTRUZIONI PANCA DA GIARDINO // GARDEN BENCH INSTRUCTIONS
ISTRUZIONI:
I blocchi sono stati prima lavati con idropulitrice, successivamente dipinti con vernice a spruzzo.
Una volta preparato e livellato il terreno, i blocchi sono stati posati con l’aiuto della bolla e usando colla milleusi. In questa configurazione noi abbiamo preferito aggiungere anche una vite per fissare ulteriormente il bocco verticale dello schienale alla struttura.
Per la seduta le assi sono state sagomato di modo che si incastrino nei blocchi, i pali dello schienale sono infilati nei fori dei blocchi, tranne l’ultimo in cima che è avvitato sulla sommità dei blocchi verticali, per dare più stabilità al tutto.
Naturalmente mi sono fatta aiutare dagli uomini di casa: mio figlio ha dipinto i blocchi, mio marito ha segato pali e tavole e forato i blocchi. Io ho preparato la posa, assemblato e incollato i blocchi e dipinto il legno. L’altro mio figlio faceva l’aiutante per tutti, insomma Lavoro di squadra!
//
INSTRUCTIONS:
The blocks were first washed with a high-pressure washer, then painted with spray paint.
Once prepared and levelled the soil, the blocks were laid with the help of bubble and using “milleusi” glue. In this configuration we preferred to add a screw to further fix the vertical seat back to the structure.
For the seat the boards have been shaped so that they fit in the blocks, the backrest poles are inserted in the holes of the blocks, except the last one, at the top, that is screwed on the the vertical blocks, to give more stability.
Of course I got help from my men: my son painted the blocks, my husband sawed poles and boards and drilled the blocks. I prepared the pose, assembled and glued the blocks and painted the wood. My other son was the helper for everyone, this is teamwork!
PANCA DA GIARDINO FAI DA TE // D.I.Y. GARDEN BENCH
 |
Rieccomi
qui, torno dopo molto tempo sul blog con un progetto fai da te fatto
interamente con materiali di recupero che avevo già. Una panca da giardino in
blocchi di cemento e legno!
L’ispirazione l’ho presa da Pinterest dove ci sono
tantissimi progetti con i blocchi, le
motivazione principali sono il costo irrisorio e la resistenza della panca!
Questi blocchi in cemento giacevano dietro casa almeno
dagli anni 70, i pali di legno erano avanzati da un altro progetto, le tavole
vengono da un vecchio carro.
Ho comprato solo la vernice, la colla e l’impregnante con
circa 15 euro. Trovate le istruzioni e le foto del processo nel prossimo post.
Oltre alla soddisfazione di creare la panca da me, mi fa
felice l’idea che non dovrò preoccuparmi che arrugginisca (come con quelle di
metallo), né che sia troppo piccola o debole per accogliere tre persone adulte
come volevo, quando le parti in legno saranno rovinate non sarà un problema
sostituirle.
Posso decorarla in modo differente cambiando accessori e
colori: cuscini, tappeto, candele, lanterne, luci, con ombrellone, senza, con
tenda, ….
Al momento ho riutilizzato un vecchio ombrellone blu per
proteggere dagli aghi di pino chi sta seduto, ho aggiunto un tappeto da esterno
preso da Casashop a 5 euro, riutilizzato 4 cuscini da sedia spaiati unendoli in
una fodera fatta con una tenda Ikea avanzata.
/
After a long time I am back on the blog with a DIY
project made entirely with recycled materials, that I already had. A garden
bench made of concrete blocks and wood!
The inspiration comes
from Pinterest, where there are lots of projects with blocks, my motivation is made
of the derisory cost and the resistance of the bench!
These concrete blocks
were behind my house from the 70s, the wooden poles remained from another
project, the boards come from an old wagon.
I only bought the
paint, the glue and the color for about 15 euros. You will find the
instructions with pictures in the next post.
I’m satisfied because
it’s a diy project and I am happy I will
not worry about rust (as for a metal
bench).
It is enough large and sturdy to accommodate
three adults and when the wooden parts will be ruined it will not be a problem
to replace them.
I can decorate it
differently changing accessories and colors: cushions, carpet, candles, lanterns,
lights, with umbrella, without, with curtains....
Right now I reused an
old blue beach umbrella (to protect me from pine needles), I added an outdoor
carpet bought at Casashop for 5 euros, reused 4 unpaired chair cushions joining
them in a lining made with an advanced Ikea curtain.
.
12.7.19
ORDERGASM: unpredictable sensation of pleasure caused by the sight of perfectly ordered spaces
16.11.18
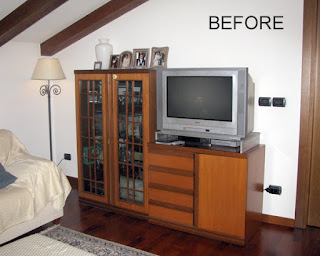
MOBILI PORTA TV SOTTO I 600 EURO //
TV STAND AND STORAGE SYSTEMS UNDER 600 EUROS
/
The living room tv wall storage system. I’ve been wondering about this project for 17 years! Finally the time has come!
.
7.9.18
RI-USO N°8: da vassoio a bacheca //
REPURPOSE No 8: from tray to board
3.9.18
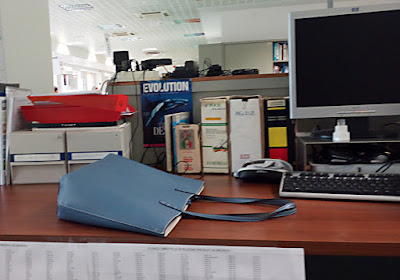
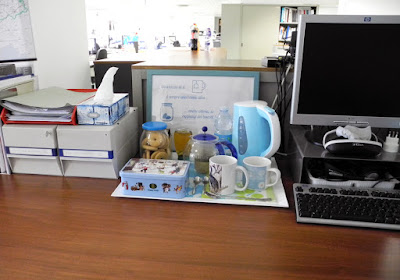
OFFICE TEA CORNER
.
To get inspiration here follows the details.
28.8.18
LE GALLERIE DELLE PRIGIONI - TREVISO
Il recupero delle prigioni asburgiche nasce dall’idea di Luciano Benetton di trasformarle in un nuovo spazio dedicato all’arte contemporanea ad accesso gratuito. Vi consiglio di visitarlo. Ho perso la prima mostra, ma quella attuale mi è piaciuta molto, come mi è piaciuto ovviamente il restauro, bello il fatto che questo edificio storico in posizione così centrale sia rinato e torni ad essere utile alla città con un fine molto più nobile di quello originale.
27.7.18
M1ka Market Place and Open Market in Treviso
14.6.18
RI-USO N°7: lampade dal salotto alla camera //
REPURPOSE No 7: lamps from the living room to the bedroom
/
16.3.18
FUORIPORTA CON 4 EURO //
4 EUROS DIY FRONT DOOR WREATH
23.2.18
ARREDARE LA DISPENSA CON MENO DI 320 EURO DA IKEA E LEROY MERLIN //
PANTRY ROOM FURNITURE FOR LESS THAN 320 EUROS WITH IKEA AND LEROY MERLIN
Nel mio ultimo post vi ho raccontato come ho ricavato una stanza per farne DISPENSA E ANGOLO CRAFT, dove hanno trovato posto tutte le cose di uso frequente che non stavano in cucina o nel ripostiglio, tipo: scorte alimentari, borsoni attività sportive, kit per dipingere, creare, decorare impacchettare, cucire, piccoli e meno piccoli elettrodomestici (affettatrice, vaporiera, tostapane, friggitrice, macchina del pane, macchina per il caffè), l’asse da stiro, il ferro da stiro e la scala grande (io sono alta 152 cm la scala mi serve spesso!) e molto altro.
/
My last post tells you about how I’ve created my PANTRY AND CRAFT ROOM, this little space hosts all frequently used things that can’t stay in the kitchen and in the storage room, such as: food stock, sports bags, accessories and materials for craft works (paint, sew, wrapping, decor, create…), home appliances (slicer, steamer, fryer, toaster, bread machine, coffee machine), ironing board, iron and the big stair (I’m 152 cm tall, so I need it frequently!) and many more things.


